How to Start with Zoom in WebinarPress
As you may be aware, for some time now, we've been using the Zoom API with a JSON Web Tokens (JWT) app type to facilitate seamless webinar hosting through our platform. This method allowed us to provide secure and reliable access to Zoom's features, ensuring a high-quality experience for our users like you.
However, we need to bring to your attention that Zoom has recently deprecated the JWT app type, which means it will no longer be available for authentication purposes. Instead, Zoom is transitioning to the use of Server-to-Server OAuth or OAuth apps to achieve the same functionality.
We have successfully implemented the functionality according to zoom’s new requirements.
For successful use of Zoom in WebinarPress, you have to create a free Legacy app in the zoom marketplace (It's simple) and then connect that app to WebinarPress. Below we have mentioned step by step procedure for that.
Step to Set Up Zoom in WebinarPress Plugin
Step 1: Go to https://marketplace.zoom.us/
Sign in to your zoom account if you already use zoom. Ensure that you use the same account for both the marketplace as well as the zoom conference. If you haven’t used zoom, create a new account.
Step 2: Create New Legacy App
Go to the Develop tab on the menu and select Build Legacy App. Then, Click on Meeting SDK option. You will see a window pop-up.

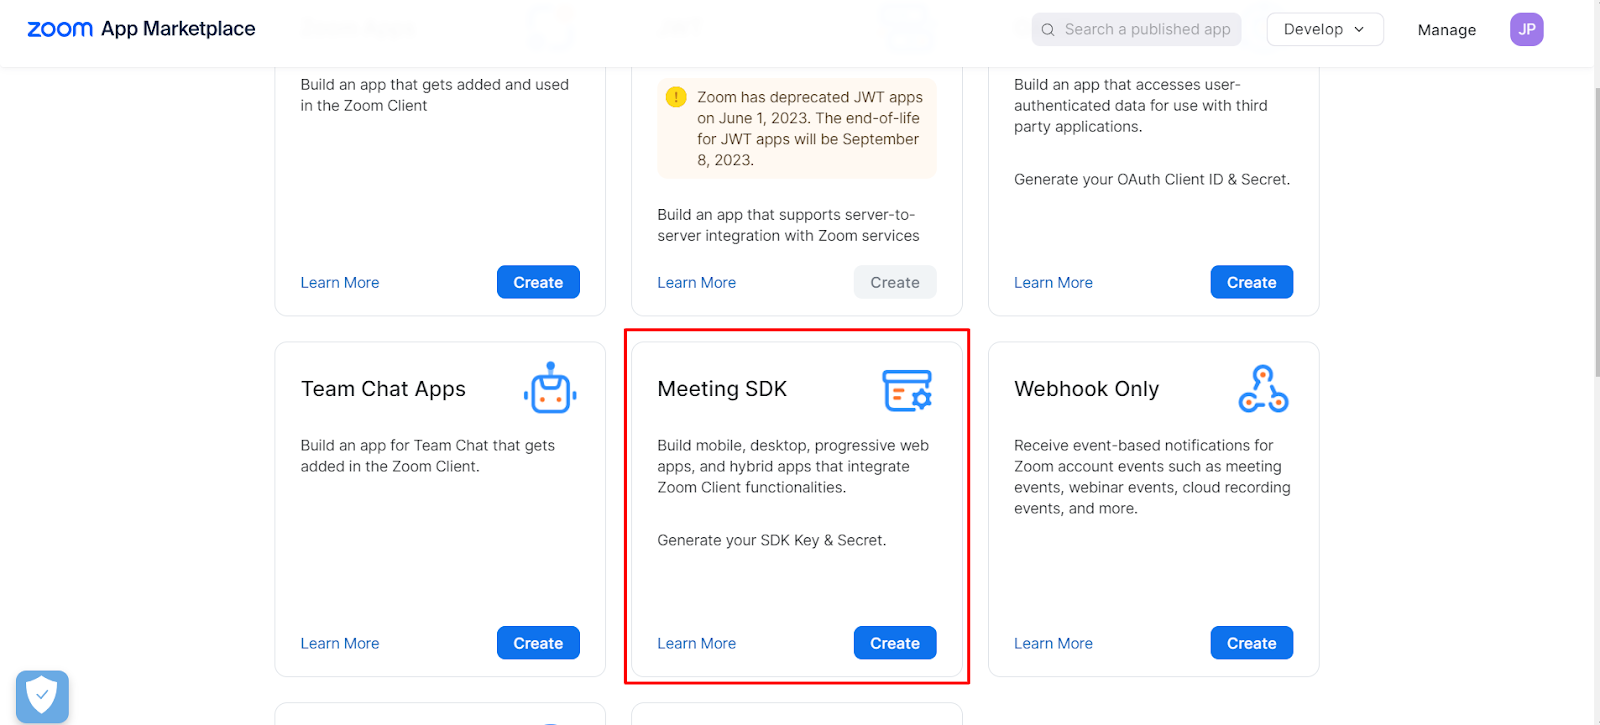
Give the appropriate name to the App, you can choose any name (For example, Zoom Dev, Zoom Integration). After that, turn off the Radio Button and click on Create.
Note: Keeping the Radio Button on will publish your App publicly. So make sure to turn off that button.

Step 3: Add Basic Information
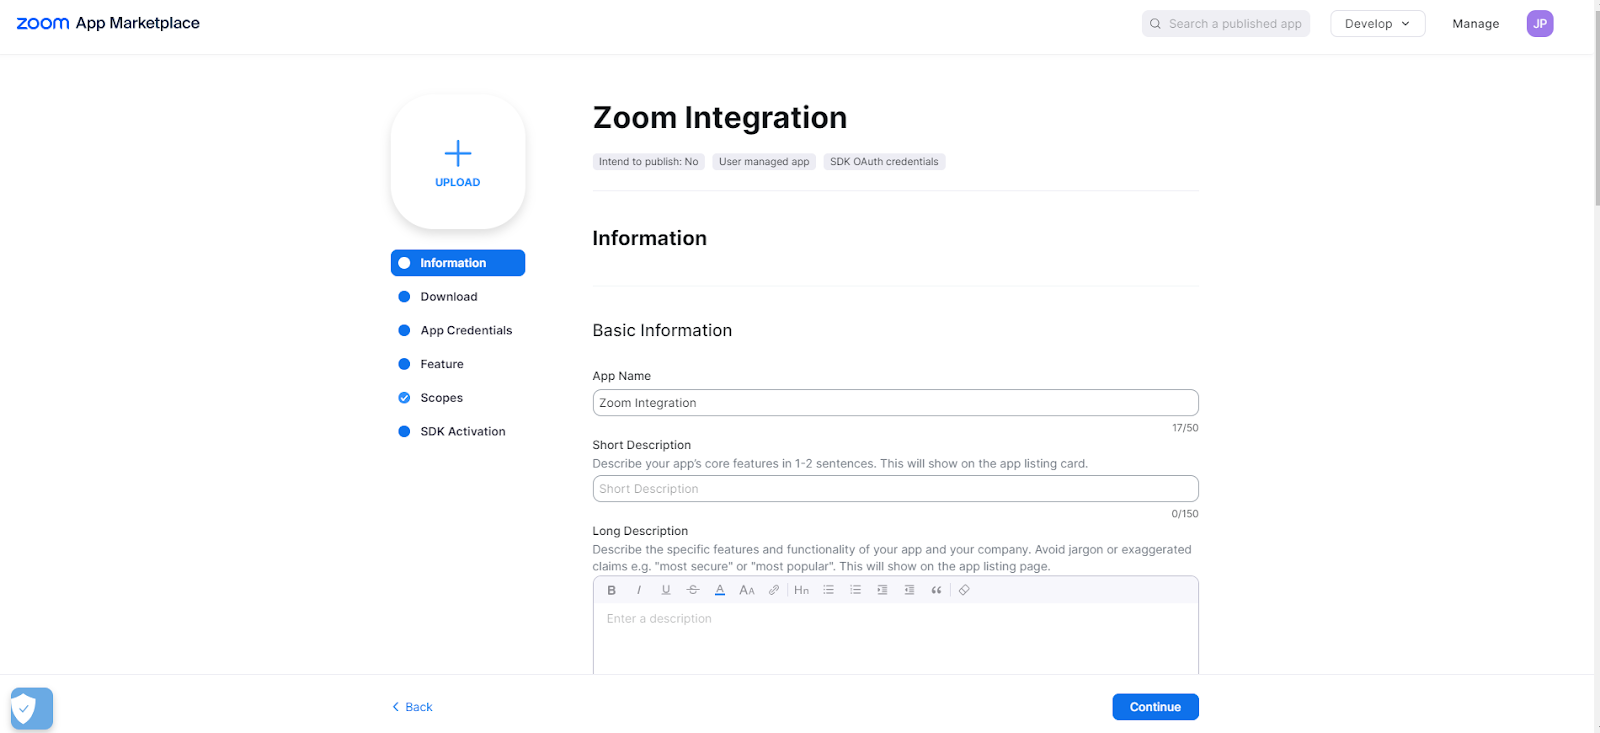
You will be redirected to a new page that looks like the image Above. Add your basic information.
Add App description; you can write about the purpose of creating an app.
In this case, Zoom integration. Fill out the details about your website; what service or product it sells, etc. Add a logo if you want to. It’s not mandatory.
Fill in the details about your company name and website category, market segment and line of business as per your business.
Add your Name and Email ID. Also, make sure to add links of privacy policy, terms of use, and support or help page of your website.
Click on Continue
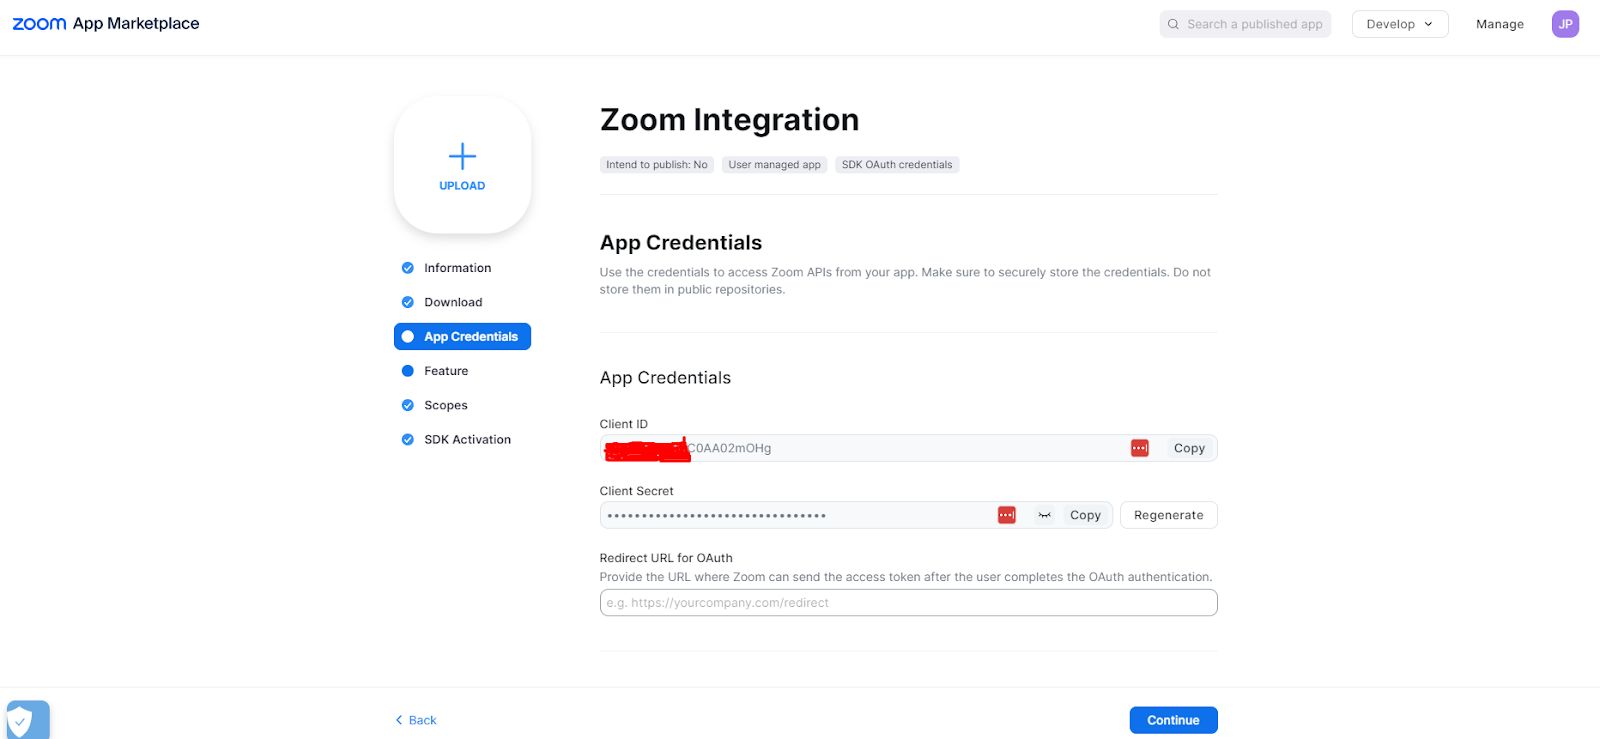
Step 4: Click on the App Credentials
Open the App Credentials tab and just copy Client ID and Client Secret.
Step 5: Open WebinarPress Plugin

Go to WebinarPress Plugin and open setting tab. There, you will find the Zoom setting option. Click on that. Paste the Client ID and Client Secret copied from the Zoom.
Save the changes.
You have set up the zoom integration in WebinarPress. Now you can use WebinarPress and conduct webinars through Zoom.